Set up bulk gclid import (deprecated)
Please note that this guide is deprecated. For server-side conversion imports into Google Ads, we recommend the standard approach. The new recommended apporach for setting up conversion actions for data import can be found here.
This document describes how to set up regular import of counted results for conversions in Google Ads.
Creating a conversion action
PPC Manager will prepare a conversion action that will be used to import margin/profile.
In the Tools and settings under Measurement / Conversions, create a new conversion action by selecting Import and Other Data Sources or CRM, and finally Track Conversions from Clicks.
In the conversion settings, select the category Purchase and set the action as secondary action so that the data from the new conversion does not affect the automated bidding strategies (smart bidding) for now. Note: The conversion name must match the conversion name that will be sent from MhubCloud. The conversion name therefore acts as a matching key.
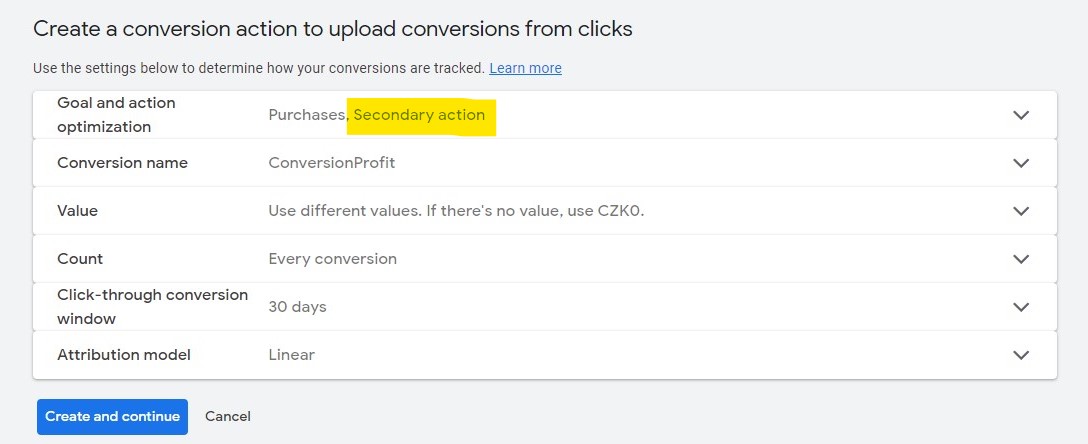
- Select an attribution based on whether you want to upload data to your account that has already been attributed on the advertiser side or use one of the Google Ads attribution models. In the first case, you choose an external attribution and send its credit/merit to each conversion using decimal numbers and only send a portion of the margin from the order in the same way. In the second case, you can choose one of Google's attribution models:
- Last Click
- First Click
- Linear (Linear)
- Time Decay
- Position-Based
- Data-Driven attribution is only available after a sufficient number of conversions have been collected for a given conversion action - so initially you need to select a different attribution, but later you can change the attribution to Data Driven.
- After creating a conversion action, it can take up to 4 hours before you can upload the import file. So make sure you create it in advance.
Import settings
The output of Mhub Cloud is two files for each Business Unit, one containing new conversions and one updating the value of previously uploaded conversions. The URLs for the specific files will be passed to you in a secure way.
Update settings
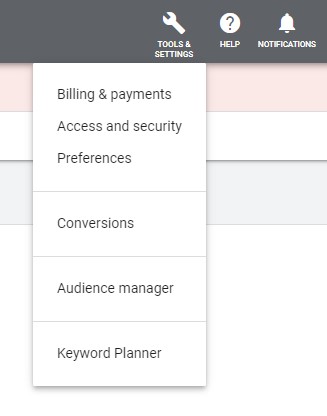
- In the Google Ads portal, select Tools & Settings (top right bar) and select Conversions from the options.
- Select Uploads from the left panel menu.
- Switch to the Schedules tab.
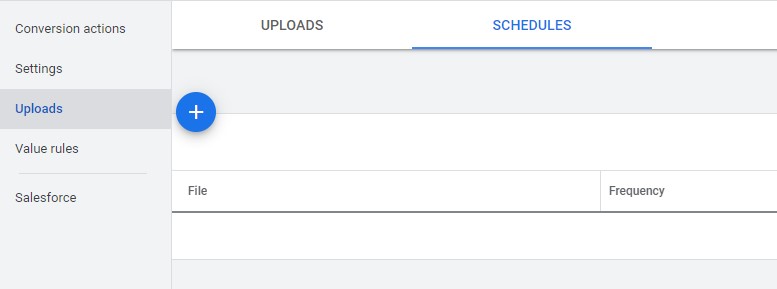
- Select the + button to start creating a new timed import.
- In the source selection, choose HTTPS.
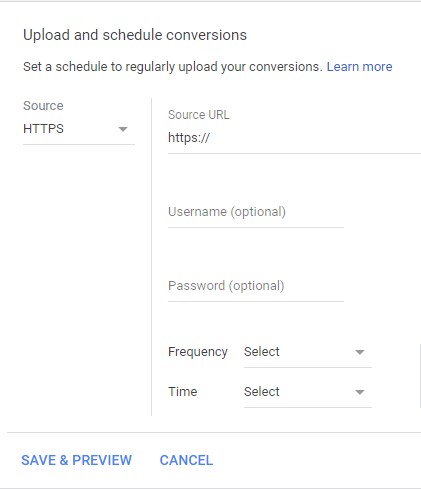
- Enter the source URL for the new conversions file (no need to fill in username and password).
- Set the desired frequency (every 24 hours) and import time at 7:00.
- Confirm the settings using the Save & Preview button.
- Repeat steps 4) - 8) for the updated conversions file.
Setting up alerts and crisis scenarios
Mhub Cloud already has an alerting mechanism built in automatically. However, Mhub Cloud doesn't cover the entire process path, which ends right in Google Ads. Ideally, you need to set up the alerting mechanism here as well to have the entire process path covered.
It's a good idea to prepare for a situation where there would be a data loading failure. You need to set up control alerts that inform you in case the data in Google Ads doesn't load (an automatic rule for zero impressions for large campaigns, or a script to check for zero conversions across the entire account, etc.). Switching the conversion action Once you have collected data in your account for a sufficiently long period of time (depending on the length of the conversion window) and you have managed to eliminate file loading errors, you can move on to setting the margin/profile itself as the main conversion action.
Switching at account level
To switch to margin/profile optimization, you need to change the conversion action settings. Select the new conversion action and set it as "Primary action" in the settings in the Conversion section. This will make these conversions start appearing in your conversion reports and will be handled by automated offers.
On the other hand, remember to set as secondary action the conversion column for the original conversion.
Selective conversion settings
For search and content campaigns, you can use selective conversion settings - that is, change the conversion action in the settings of a specific campaign. This will leave the original conversion action set for the entire account and set a new one for the campaign. This way, you can test the behavior of smart bids after switching to margin-based optimization on a smaller sample of data, rather than directly on the entire account.
Unfortunately, you can't change the conversion rate for Google Shopping/PLA campaigns, so these campaigns can only be converted with an account-wide switch. At the same time, PLA campaigns often bring in the largest portion of conversions in an account, so you won't avoid a bigger spike in conversions anyway. But you can get a better idea of how the transition might go.
Custom columns
Once you start collecting margin data in your account, create custom columns that allow you to track new conversion without changing your account settings in any way.

Click on Columns → Custom columns
Then set all the columns you need - e.g.:
- Conversion
- Margin value
- Conversion ratio
- ROI (ROAS)
- Profit (subtract the cost of advertising from the Margin Value column)
Use the "All Conversions" metric for these columns, not just "Conversions". All conversions include all conversion actions you measure. When setting up a custom column, you select the appropriate conversion action in the right column.
Example of setting up the Margin column:
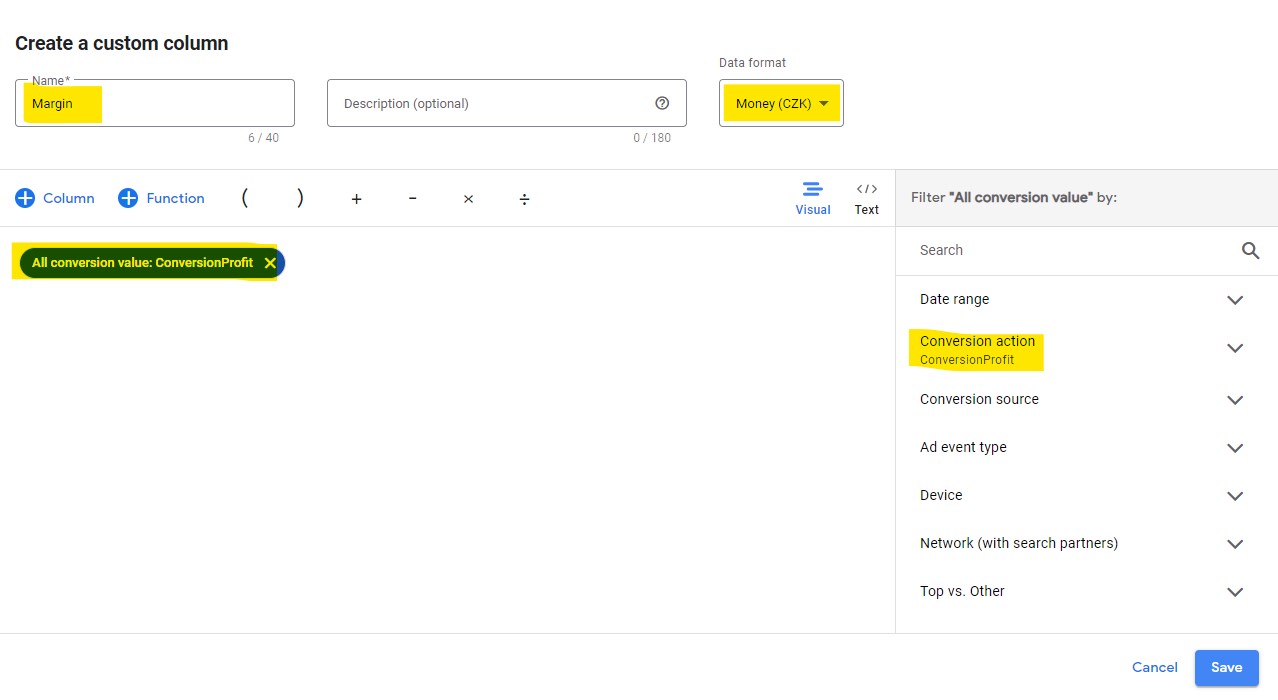
You can then save your own columns in your own column layout and you can also view these metrics in a chart to track their evolution over time.
Optimization after conversion switch
Manual bidding
When using manual bidding, switching to a new conversion action doesn't have a major impact on campaign performance because the primary price is tied to the click-through, not the conversion, and you can respond flexibly to any fluctuations.
Smart bidding
If you're using automatic bidding based on conversion data for your campaigns, you have two basic options to switch from optimizing by turnover to optimizing by margin.
1) Switch to manual CPC
This method allows you to have better control over your ad spend and display if you're not sure you can properly respond to the behavior of automated strategies and monitor performance after switching conversion actions. Switch to manual CPC for a period of 30 days to allow campaigns to accumulate enough new conversions and then switch to tROAS. During this 30-day period, you need to account for a drop in campaign performance. After switching to tROAS, there is still a learning phase where there can also be fluctuations in performance in both directions (depending on how well the manager sets the ROAS target).
2) Adjustments to tROAS
This method involves maintaining the original tROAS strategies and gradually adjusting them to avoid extreme fluctuations in campaign performance. It requires advanced experience with auto-bidding, but allows you to reduce the time with performance drops and convert campaigns straight from one conversion to another.
What approach to take
What specific process to choose always depends on the individual situation of the advertiser.
Many factors have an impact, such as:
- The experience level of the administrator
- Number of conversions - the higher the number, the smoother the transition
- Conversion rate - the higher the conversion rate, the smoother the transition
- Original conversion type and attribution (system/Google Analytics conversions) - how much change happens in the data overall
- Margin % - the higher, the easier and faster the transition
- Conversion lag time - the longer the lag time, the longer the performance drop
Once all factors are taken into account for a particular advertiser, we can more closely estimate the potential impact on campaign performance and design the ideal approach for the smoothest transition in optimization.