Installing mHub Cloud on Azure
Setting up an mHub Cloud instance on your Azure subscription is a simple and user-friendly process. The setup, including the initialisation of all resources, only takes about 15 minutes.
Find mHub Cloud in the Azure Marketplace
The first step towards installing mHub Cloud is to open the Azure Marketplace and search for mHub Cloud.
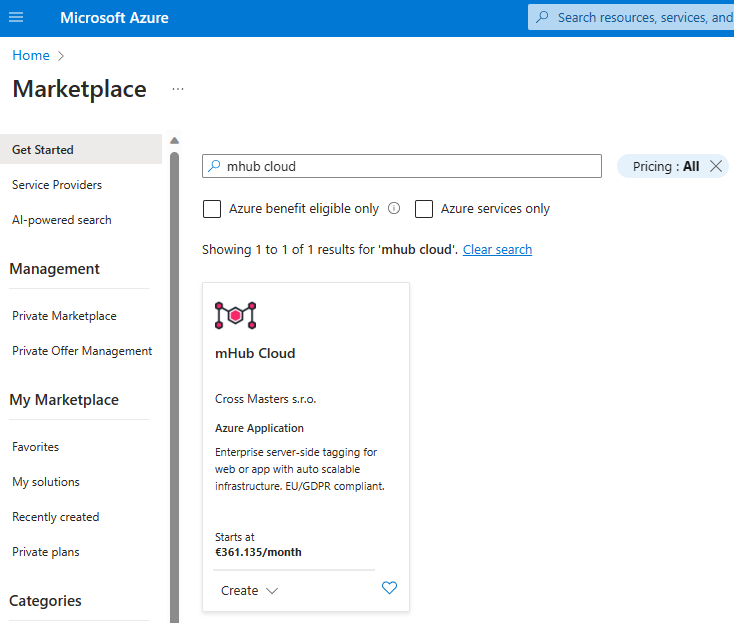
Click the on the result and you will be taken to the main page of mHub Cloud in the Azure Marketplace. From there, you can get information about the product and begin the setup process.
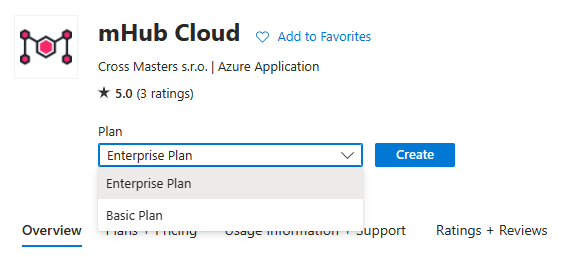
Choose the plan that suits you best and continue by clicking create. The comparison between plans can be found in the Plans + Pricing tab.
Set up the mHub Cloud resource group
Basics
From the Marketplace, you will be redirected to an Azure setup wizard. There, you will need to configure the main parameters of your mHub Cloud instance before it can be initialised.

- Subscription: This refers to the subscription within your Azure tenant where mHub Cloud will run.
- Resource group: Resource groups are directories used for storing related resources. It is recommended to create a dedicated resource group for mHub Cloud using the "Create new" button.
- Location: This is the location where your data will be processed. For clients in the EU, we recommend setting the location to West Europe.
- Application name: Ideally, this should be the name of your company or business unit.
- Managed resource group: Azure will generate a name for you. It is recommended to replace the automatically generated digits with the name of your company as provided above.
Config mHub Cloud
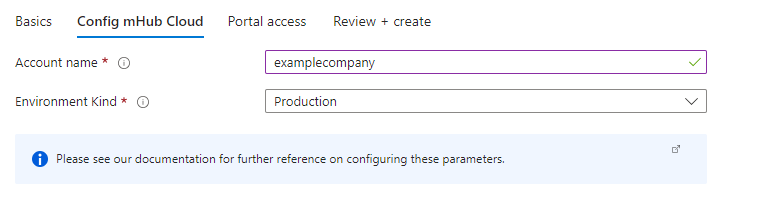
- Account name: It is recommended to use the same name as the application name in the previous step.
- Environment kind: Select the kind that matches your intended use case. If you are planning to use mHub Cloud for business purposes, this should be set to Production.
Portal access

- Email of portal admin: Enter the e-mail address of the person who will act as an administrator of the mHub Cloud instance on the Portal.
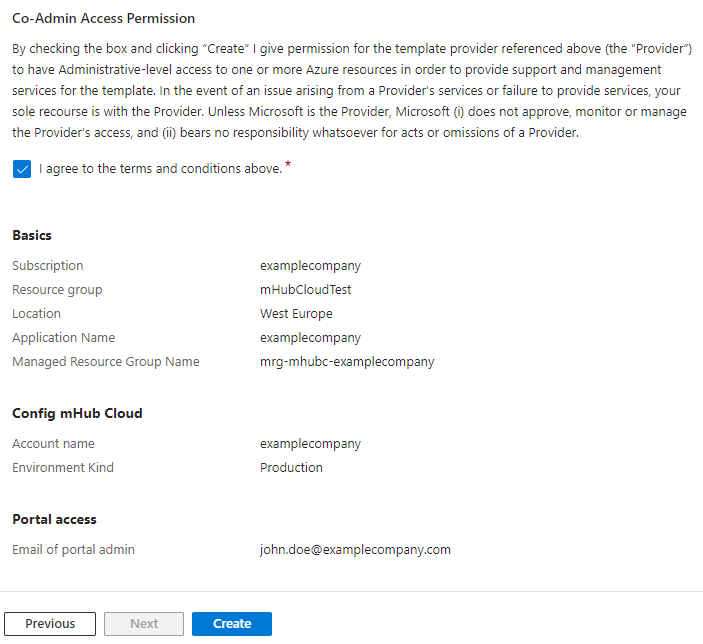
Review
Once all information has been provided, you can continue to the final step. There, you will need to consent to Cross Masters to access your mHub Cloud resource group for maintenance purposes. This is necessary for us to ensure proper operation of your mHub Cloud instance. It may also be necessary to confirm contact details, such as an e-mail address and phone number. After consenting, review your information and press Create.
After you have confirmed the creation of your mHub Cloud instance, Azure will begin deployment. This can take up to 15 minutes, but is typically faster. Azure will notify you when the deployment is finished.